A friend suggested that I write about what I think are the essential cooking utensils every cook should have, especially because I have the perspective of having previously been a Pampered Chef consultant. And there were definitely items that I thought were worth the money and some that weren’t.
Here are the ones I don’t want to have to live without (Pampered Chef or not):
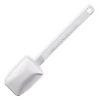
- Rubber spatula, spoon style
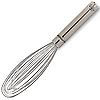
- Metal whisk with many wires
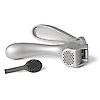
- Garlic press – mine doesn’t require you to remove the peel, which is SO nice & it comes with its own cleaning tool so you can get the stuff out of the holes easier
- At least one really good knife that cuts through chicken fat like butter
- Can opener – mine is a smooth-edge one, which is a good bonus
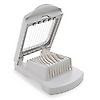
- Egg slicer plus – the ‘plus’ means it can also do strawberries, mushrooms, etc
- Liquid measuring cups
- Several measuring spoons – mine are adjustable so you don’t need multiples of sets, just a few of each
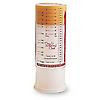
- Measure-All measuring cup – this tool easily measures & pushes out semi solids like peanut butter & honey so you don’t have to try to scrape it out of a regular measuring cup, leaving lots of residual behind; it also duals as a liquid measuring cup
- Pizza cutter
- Good bread knife – those that have experienced smushed bread or cake know what I mean
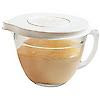
- Batter bowl mixing bowls – these are deep cup-shaped glass bowls with a handle & measuring elements on the side & a lid; they make it easy to pour out the batter into a cake pan & also don’t allow splatter to appear on your kitchen walls & appliances as easily as other shallower bowls; mine also are oven-safe so you can bake in them (perfect for those “doll” cakes and my Pampered Chef “Baked Alaska” layered cake, see below for recipe – you’ll notice that many products I’ve listed are used to make this cake!)
- 9×13 baking pans w/ lids
- Vegetable peeler – my favorites have always been the plain, stainless steel ones, not the fancy ones since I’ve had better success with the plain ones
- Crockpot (especially with disposable crockpot liners!)
- Kitchen shears (scissors) – I use mine for cutting biscuits for monkey bread, pepperoni for pasta salad, etc. Others have used theirs for cutting meat & pizza.
- Hand-mixer (some would contest that a full-size mixer like a Kitchenaid is essential, but a hand-mixer is all I’ll ever need – I don’t make bread! And for lots of jobs I get by with just a whisk!!)
- Colander
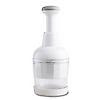
- Food chopper for chopping onions, nuts, etc (but it’s not great for bell peppers or ingredients with tougher skins)
- Cutting boards – these are good for saving your counter top or fingers, as well as not dulling your knives as easily (though glass ones will do so & wood ones tend to harbor bacteria, so I go with the polypropylene – hard plastic – ones); I have multiple sizes for different kinds of jobs
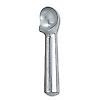
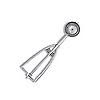
- Ice cream dipper with liquid in handle that melts the ice cream for easier scooping
- Cookie scoops, different sizes – SO much less hassle & all your food comes out the same size (Note: metal is better than plastic, in my experience)
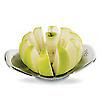
- Apple wedger – works great for pears too!
“Baked Alaska
1 pkg (18.25 oz) devil’s food cake mix (plus ingredients to make cake)
¾ C semi-sweet chocolate chips, divided
8 oz. cream cheese, softened
1 C powdered sugar
16 oz. Cool Whip, divided
Preheat oven to 375 degrees. Spray batter bowl w/ cooking spray. Prepare cake mix according to package instructions; pour into batter bowl. Bake 1 hr, 10 min – 1 hr, 15 min. or until cake tester inserted in center comes out clean. Let cool for 15 min. Run knife around outside of cake and gently turn out onto cooling rack, large end down. Cool 3 hrs.
Using serrated bread knife, slice cake into 4 equal layers horizontally – slice in half, then slice each half into two equal layers to create the four layers.
Chop ¼ C of the chocolate chips; set aside. Melt remaining chocolate chips in microwave until smooth. In clean batter bowl, whisk cream cheese until smooth; add powdered sugar & whisk until smooth. Stir in melted chocolate; mix well. Fold in 2 C Cool Whip and chopped chocolate chips. Spread bottom layer of cake with about half of the filling. Repeat with remaining layers. Spread any remaining filling over outside of cake to create a smooth surface. Frost cake with remaining Cool Whip. To form peaks, press knife into topping & pull away (this works best when Cool Whip is cold & hasn’t set out for a bit). Repeat over entire surface of cake. For easier slicing, refrigerate cake at least 30 minutes. To cut, slice one wedge at a time so the cake doesn’t fall apart. You may either slice thin, long pieces of whole cake, or slice larger wedges and divide in half vertically for individual pieces.

This is so helpful to me!! I don't have many of these items and I now have a list- thanks!!
I loved this post. Thanks so much Cari.