A fabulous fellow blogger recently posted about making homemade yogurt and said I could repost for y’all here. I’m going to try it myself very soon. I promise. I hope. Enjoy!!
http://ifthesewallsspoke.blogspot.com/2011/09/homemade-yogurt-instructions.html
So first of all, this was not my idea. I didn’t even know it was possible to make yogurt at home without a yogurt maker (which would make enough to last about one DAY over here), or at least a lot of jars, temperature checks, storage space, blah blah blah. I had looked into it, and thought it was way too time consuming and tedious for me to mess with (for instance, a very long tutorial on this site here). Then, my friend Robyn, sent me this link: here. Robyn is a lot smarter than me, and a lot more kitchen savvy. Plus, she likes to make stuff from scratch and she’s thrifty. See why I like her? All my good recipes started from her, somewhere along the line! Anyway! I finally sucked it up and tried it, and it worked. Glory, Glory, Halleluiah! She and I were both skeptical, because it was that easy. So, I sucked it up again, and read thru the long, boring, tedious instructions on the first site. Just to make myself feel better, I thought I’d better check temps and make sure I wasn’t going to kill us all with rotten homemade dairy products. Turns out, to start you only need to remember a few things, and once you’ve got a system, you won’t have to check temps ever again.
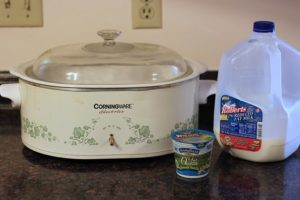
I have a big crock pot, I don’t know what size. I’m guessing it’s between 6-8qts. I should go fill it up right now and check, but I’m too lazy. Laziness is what got me to this recipe in the first place, so think whatever you want about that! Anyway, this is what I use.
- Big crock-pot, milk, starter yogurt.
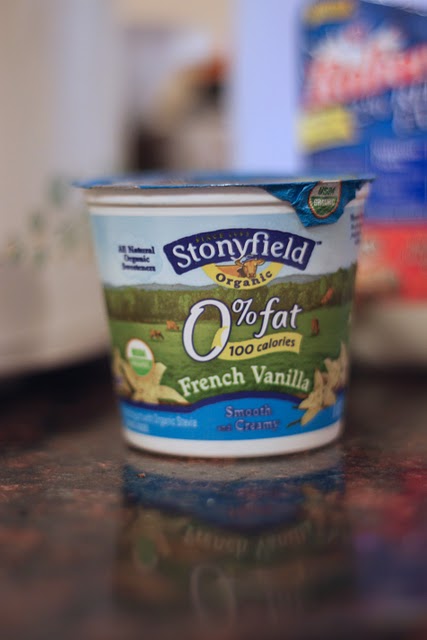
This is the yogurt I used for my starter. This 6oz of yogurt costs $1 and contains 6 different strains of bacteria. I thought, if I’m going to make my own, I may as well make some really good yogurt, right? Once you’ve got your batches going, you don’t have to buy another starter, you save back some of your own, and use that. For every 8 cups of milk you use, you’ll need 1/2 cup yogurt (4oz, for all of you who are math-challenged like me).
- Start by pouring 8 cups of milk into the crock-pot, set it on LOW, and leave it for 2.5 hours. I discovered that mine cooks hotter than some, maybe because it’s bigger? Your goal is to get the milk to 185*. I caught mine at 189* after 2 hours, so I wrote that down, and will never check the temp again for that step.
- Then, turn off (or unplug, if the knob fell off six years ago) and leave it for another 2.5 to 3 hours. Again, you will just have to check temps and see how long it takes…your goal is to get the milk back down to around 110*. Some people put it in the fridge to make it go faster, take the crock out of the warmer, put it outside…whatever. I’m lazy! So, I just unplugged mine, and left it sitting on the counter, and it took about 2.5 hours. This is where other recipes get crazy with pouring into individual jars, setting up warm baths, packing hot water in coolers…too much work for me.
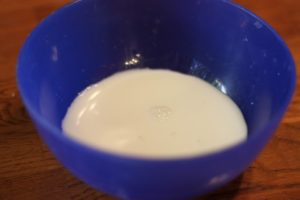
- Once you’re at about 110* remove about 1/2 cup warm milk and mix with your 1/2 cup starter yogurt. I say mix, but I actually kind of fold gently. Then, pour the starter + milk back into the crock.
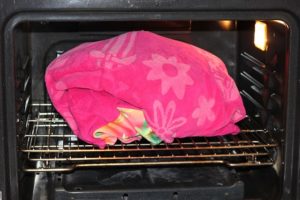
- Wrap the crock-pot (which now contains milk + starter, at about 110*) in heavy towels, and let it sit. This is when the starter is going to make yogurt out of all that warm milk, and your goal is to keep everything warm while it’s doing it’s thing. Since we like our house pretty cool, I decided to warm up my oven to 200*, then turned it off, then shoved that whole mess into the oven and shut it. I figure it keeps the heat in a little better, plus it’s out of the way. Then I unplug my oven so I don’t forget it’s in there 🙂
That. Is. It. You can let it sit anywhere between 4 and 24 hours. I’ve been letting mine go between 6 and 8 hours, and think the consistency and sweetness are great. Plus, since I’m not checking the temp or keeping it heated, I figure 6-8 hours is probably the max I should go. However, this last batch went closer to 13 hours, because I forgot about it…and it was fine. It did have more whey on the top, which is OK. There are all kinds of sites with info about the length of time you should let it incubate…like this one, if you care and aren’t as lazy as I am 🙂
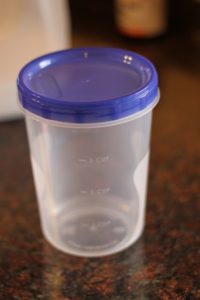
I store mine in quart containers, in the fridge. We go through it so fast, I can’t imagine it would do me any good to freeze it, but you can freeze yogurt!
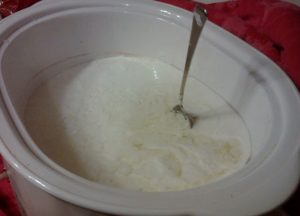
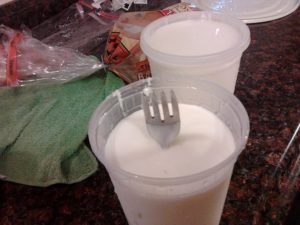
THICK! And, cheap. Holy thrifty goodness. I owe Robyn $$ for getting me obsessed started. With a $3 gallon of milk, you can make 6oz of that expensive yogurt for $0.15. For real? Let me check my math again… YES. FIFTEEN CENTS vs. $1? I am in. Just don’t forget to save some back to use as a starter for your next batch, otherwise you’ll have to add another dollar… 🙂
And yes, I’ll probably stand a utensil up in the yogurt every time I make it, just because I’m so amazed that it’s so thick and it worked! Every time I open that container I feel like I’m cheating the system. Take that, suckas! We’ve been adding pureed fruit or homemade jam to ours, and making parfaits. Anything tastes better when you call it a parfait!
If you want to copy and paste, here’s the quick version:
Heat 8 cups milk to 185* in crock-pot (approx. 2.5 hours)
Turn off and cool milk to around 110*
mix 1/2 cup starter yogurt with 1/2 cup warm milk-then add back into crock-pot
Cover, wrap, and let sit 4-24 hours
Viola!

Who says Viola? Voila! Not so much the stringed instrument, but more "ta da!" 🙂 HAHA! Thanks for re-posting this! Can't wait to hear how it turns out for you.